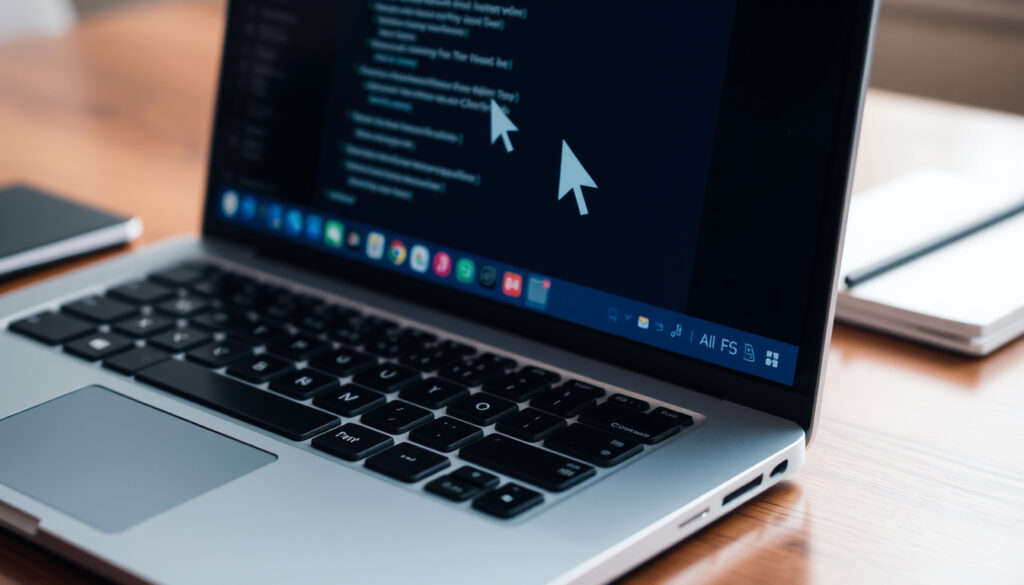
How to Take a Screenshot on a Chromebook: Shortcuts & Tips
There’s a good chance you’ve found yourself staring at your Chromebook screen, wondering how to grab a quick screenshot without hunting for a Windows key. You’re not alone — it’s one of the most common questions new Chromebook owners ask. Whether you need to capture the entire display or just a portion, Chrome OS offers several straightforward methods, including keyboard shortcuts and a built-in screen capture toolbar. After reading this, you’ll know exactly which method works for your model and how to find your captures instantly.
Default full-screen shortcut: Ctrl + Show Windows ·
Partial screen shortcut: Shift + Ctrl + Show Windows ·
Screen recording shortcut: Ctrl + Alt + Z
Quick snapshot
- Ctrl + Show Windows for full screen (Google Chromebook Help (official support documentation))
- Shift + Ctrl + Show Windows for partial screen (Google Chromebook Help) (Google Chromebook Help (official support documentation))
- Ctrl + Alt + Z for screen recording (Google Help: Take a screenshot or record your screen) (Google Chromebook Help (official support documentation))
- Press Shift + Ctrl + Show Windows to open toolbar (Google Help) (Georgia Cyber Academy Support (educational resource))
- Choose full screen, partial, or window capture (Google Help) (Georgia Cyber Academy Support (educational resource))
- Screenshots save to the Downloads folder by default (Georgia Cyber Academy Support (educational resource))
- Power + Volume down captures the full screen (Google Chromebook Help)
- Hold Power button for screen recording or time-based capture (Google Chromebook Help)
- On detachable keyboards, use the on-screen toolbar instead
- Ctrl + Shift + F5 works when external keyboard lacks Show Windows key (Google Help)
- Open Screen Capture from the bottom-right settings area (Google Help)
- Partial screen still uses Shift + Ctrl + F5 or toolbar
Five key facts, one pattern: every Chromebook screenshot method relies on either the Show Windows key or an alternative like the Power button for tablets.
| Label | Value |
|---|---|
| Default full-screen shortcut | Ctrl + Show Windows |
| Partial screen shortcut | Shift + Ctrl + Show Windows |
| Screen recording shortcut | Ctrl + Alt + Z |
| Screenshot save location | Downloads folder (Files app) |
| File format | PNG |
Chromebooks don’t use a Windows key, but the Show Windows key (F5 or the overview key) works the same way. If you can’t find it, the screen capture toolbar is your fallback — no memorization required.
How do I take a screenshot in Chromebook?
- Press Ctrl + Show Windows for a full-screen screenshot (Google Chromebook Help).
- Press Shift + Ctrl + Show Windows for a partial screenshot (Google Chromebook Help).
- Use the screen capture toolbar for additional options (Google Help).
Full screen capture
The quickest way to capture everything on your display is Ctrl + Show Windows. The key labeled “Show Windows” (often F5 or a rectangle with two vertical lines) opens the overview mode, but combined with Ctrl it takes a full screenshot instead. According to Google’s official Chromebook Help (support documentation), this shortcut saves a PNG image directly to your Downloads folder.
Partial screen capture
For a specific area, press Shift + Ctrl + Show Windows. Your cursor turns into a crosshair — click and drag to select the region you want. The same Google Help page confirms that this method also copies the screenshot to your clipboard for instant pasting.
Using the screen capture toolbar
Press Shift + Ctrl + Show Windows again (or open it from the Quick Settings panel) to launch the screen capture toolbar. The Google Help: Take a screenshot or record your screen guide explains that the toolbar offers three modes: full screen, partial, and a window-specific capture. You can also start a screen recording directly from the same toolbar.
Both ASUS Support (laptop manufacturer guidance) and Lenovo Glossary (manufacturer’s definition) echo the same shortcuts: Ctrl + Window Switcher for full screen, Shift + Ctrl + Window Switcher for partial.
The implication: these shortcuts are hardware-agnostic across major Chromebook brands. Whether you own an ASUS, Lenovo, or any other model, the key combination stays the same.
How do I take a screenshot on a Chromebook without a Windows key?
Using the keyboard shortcut without a Windows key
You don’t need a Windows key. Chromebooks never use it — they rely on the Show Windows key (also called Overview or Window Switcher). The Google Chromebook Help states that the standard shortcuts use this key. If your keyboard labels it as F5 or an icon with two overlapping boxes, that’s your target.
Alternative methods if keys are missing
Some older or budget Chromebooks may lack a dedicated Show Windows key, especially on detachable keyboards or tablets. Google’s screen capture article offers two workarounds: press Ctrl + Shift + F5 (works with external keyboards that have F5 but no Show Windows key), or open the Screen Capture tool from the Quick Settings menu (bottom-right clock area). For tablets, press and hold the Power button and select “Screen capture” from the pop-up menu.
If your Chromebook is in tablet mode and the keyboard is detached, the Power + Volume down shortcut is the only reliable built-in method. The on-screen toolbar also works but requires you to navigate to Settings first.
The trade-off: physical keys are faster, but the software fallback guarantees you’re never stuck.
What is the shortcut for screenshot in Chrome?
Chrome browser shortcuts vs. Chromebook system shortcuts
There’s a distinction between the Chrome browser and the Chromebook operating system. Chrome itself doesn’t have a built-in screenshot command — the shortcuts we’ve covered are Chrome OS system-level. Lenovo’s glossary clarifies that the key may be labeled Switch Window or Overview, but the function is the same.
Ctrl+Shift+Show Windows for partial screenshot
The most common confusion is mixing up browser shortcuts with system shortcuts. The partial screenshot shortcut Shift + Ctrl + Show Windows works anywhere in Chrome OS, not just inside the browser. Google’s guide notes that after capturing, a preview appears in the bottom corner — you can click it to edit, delete, or copy the screenshot.
What this means: you never need a Chrome extension for basic screenshots. The OS handles it natively.
How to pull up screenshots on Chromebook?
Finding screenshots in the Files app
All screenshots are saved to the Downloads folder inside the Files app. Open the Files app (folder icon in the shelf), click “My files,” then “Downloads.” Georgia Cyber Academy Support confirms this default location, which applies to both full and partial captures.
Default save location
Each screenshot is saved as a PNG file with a timestamp-based name (e.g., “Screenshot 2025-07-29 at 3.14.25 PM.png”). Google’s Chromebook Help notes that partial screenshots are also copied to the clipboard, so you can paste them directly into a document or image editor without locating the file.
Using the clipboard for screenshots
After taking a partial screenshot, the image is automatically placed on your clipboard. Hold Ctrl + V to paste it into Google Docs, Gmail, or any text field. Google’s screen recording article mentions that the clipboard copy behavior is standard for partial captures, though full screenshots are saved to the Downloads folder only.
The pattern: full screenshots go to storage; partial screenshots go to clipboard + storage. That dual behavior is designed for quick sharing.
What does Ctrl+Alt+Z do on a Chromebook?
Screen recording shortcut
Ctrl + Alt + Z opens the screen recording toolbar. Google Help explains that this shortcut activates the same capture toolbar but with recording options. You can record the full screen, a specific window, or a partial area.
How to use Ctrl+Alt+Z to start/stop recording
After pressing Ctrl+Alt+Z, the toolbar appears at the bottom of the screen. Select the recording mode (full screen, partial, or window), then click the red record button. A countdown begins, and recording stops when you press the floating stop button or use the same shortcut again. The Google Help guide (last updated June 4, 2026) adds that recordings are saved in WebM format to the Downloads folder.
Why this matters: Ctrl+Alt+Z transforms your Chromebook into a quick screen recorder without third-party software — ideal for tutorials or bug reports.
“On Chromebooks, the standard full-screen screenshot shortcut is Ctrl + Show windows.”
“The Chrome OS screenshot shortcut may be referred to as the Switch Window or Overview key depending on the keyboard labeling.”
Confirmed facts
- Screenshots are saved to the Downloads folder (Georgia Cyber Academy Support)
- Shift+Ctrl+Show Windows captures partial screen (Google Chromebook Help)
- Ctrl+Alt+Z opens screen recording toolbar (Google Help)
- Tablet screenshots use Power + Volume down (Google Chromebook Help)
What’s unclear
- Whether all Chromebooks have a Show Windows key (older models may not)
- Exact behavior on Chromebook tablets with detachable keyboards in certain third-party keyboard cases
Related reading: Take a screenshot or record your screen · Chromebook keyboard shortcuts
youtube.com, reddit.com, youtube.com, beginrescueend.com, awesomescreenshot.com, youtube.com, youtube.com
For more detailed instructions, see our step-by-step guide on Chromebook screenshots covering all methods and shortcuts.
Frequently asked questions
How do I take a screenshot on a Chromebook tablet?
Press and hold the Power button and the Volume down button simultaneously. On some tablets, holding the Power button alone opens a menu with a “Screen capture” option.
Can I take a screenshot without a keyboard?
Yes. On a tablet, use Power + Volume down. On a Chromebook with a touchscreen, open the Screen Capture tool from Quick Settings (bottom-right corner) and tap the camera icon.
How to edit a screenshot after taking it?
After capturing, a small preview appears in the bottom-right corner. Click it to open the editing toolbar where you can crop, draw, or add text. You can also use the built-in Gallery app to edit saved screenshots.
How to take a scrolling screenshot on Chromebook?
Chrome OS does not have a native scrolling screenshot feature. You can use the screen capture toolbar in “partial” mode and manually scroll while recording, or use a Chrome extension like “GoFullPage” for full-page captures.
How to take a screenshot on a school Chromebook?
School-managed Chromebooks may block certain keys or the screen capture toolbar. Try Ctrl + Show Windows first; if it fails, check with your IT department. The shortcuts listed here work on unrestricted devices.
How to take a screenshot on a Chromebook with a broken screen?
Connect an external monitor via HDMI or USB-C. The same keyboard shortcuts will capture the external display. If the screen is completely unresponsive, use the Power + Volume down method on a tablet or detachable Chromebook.
How to take a screenshot and automatically save to Google Drive?
By default, screenshots save to the Downloads folder. To automatically save to Google Drive, open Files, right-click the Downloads folder, select “Copy to” and choose Google Drive. Alternatively, use a Chrome extension that saves directly to Drive.
For Chromebook users, the choice is clear: learn the Ctrl + Show Windows combination for everyday captures, or use the screen capture toolbar for precision. If you’re on a tablet, Power + Volume down will never let you down. The few seconds spent memorizing these shortcuts will save you frustration every time you need to share something on your screen.
More related posts
 Good Morning in Spanish: Buenos Días vs Buen Día Explained
 What Is a Canon Event – Spider-Verse Meaning and Meme Origins
 Where is Notre Dame? Location of Cathedral & University
 Atlanta Falcons vs Tampa Bay Buccaneers Match Player Stats
 Society of the Snow True Story: Survivors and Facts
 Translate German to English: Best Tools and How-to Guide
 Urgent Care Kit USA: Cost, Contents & Where to Buy
 Inter Miami vs Orlando City: Florida Derby Guide